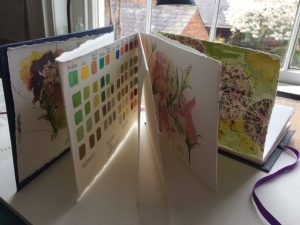
Making your own sketchbook is very satisfying and these simple concertina books are perfect for making long continuous drawings. These instructions are for a book that measures about 12cm x 10 cm when folded and finished and uses an A3 piece of paper. It is a perfect size to pop in your pocket.
Tip: Try the folding and cutting stages out using a test piece of paper before using better quality.
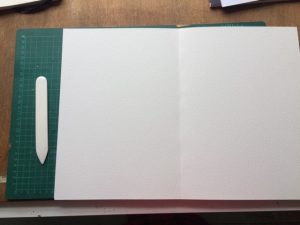
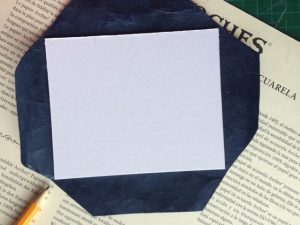
These are the things you will need an A3 sheet of good quality cartridge or watercolour paper. (I used a 420 mm x 297mm (A3) 140lb/300gsm watercolour paper)
- Craft Knife or scissors
- Bone folder or plastic ruler for creasing
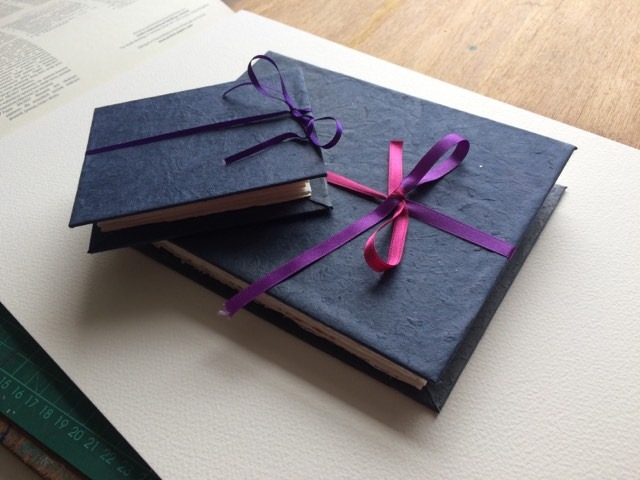
- 2 x thick card 120mm x 100mm for cover (I used the back of an old sketch pad)
- 2 x paper for covering 170mm x150mm
- Glue
- Pencil
- Steel rule to cut against if you have one.
- Ribbon 60cm
Remember the secret to successful bookmaking is accurate folding, keeping edges straight, and good creases.
Stage One:
Fold the paper in half lengthways and then fold each end to the middle. Firm the creases.
Stage Two:
Open out and fold in half width ways and then each half again to the middle. Firm the creases.

Stage Three:
Unfold the paper out.
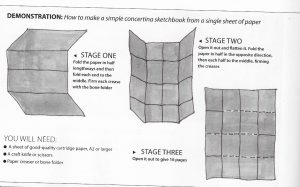
Stages 1 to 3
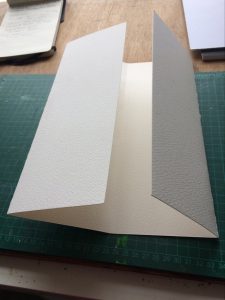
Stage 4:
Here you have to cut along the folds. I cut along the length of mine as I wanted landscape format. If you want portrait cut across the width.
First cut from the right side stopping at the first left fold of the first row. Then cut from the left along the centre fold, stopping at the last fold from the end. Finally cut from the right side to the first fold on the last row.
The diagram below from Deborah Walker’s article in April’s The Artist shows this much better than my photographs.

Fold the pages into a concertina taking care where the paper changes direction.
Stage 5:
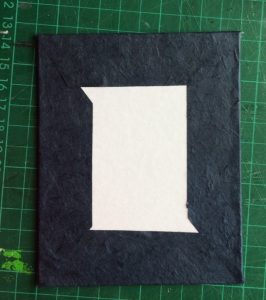
Take your card for the back cover. Cover one side with glue and place in the centre of your chosen cover paper. Press down firmly. Trim across the four corners of your cover paper at about 45 deg. Take care to not cut too close to the corner of the card. A space of cover paper of 2mm (as shown by the pencil) is about right.
Fold the cover paper over and glue. Repeat for the other cover.
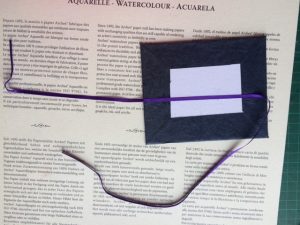
Stage 6:
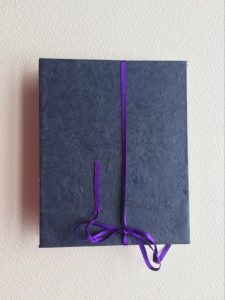
Take your ribbon and glue it across the centre of the back cover. You need to have enough to go over the front cover and tie on the side.
Stage 7:
Glue the outside page of one side of your concertina. This is to stick to the back cover so make sure that it opens correctly. Apply the glued concertina to the back cover keeping edges even and square. Open the concertina and press it firmly from the inside.
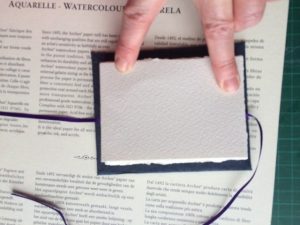
Now glue the top outside edge of your concertina and place the front cover on top. Again open the concertina out and press the page to the cover firmly.
Finally tie the ribbon!